ESP8266 is probably the most popular microcontroller developed by Espressif Systems among hobbyist and electronics enthusiasts for IOT projects . It is popular because of its low price (under $5) and high capabilities and the best part is it can be programmed through Arduino IDE.
In this article i will be guiding you to setup ESP8266 core in Arduino IDE for programming it through the IDE.
Lets get started,
After the successful installation of ESP8266 in your Arduino IDE, you will be able to select ESP8266 boards from Tools>Board Section. Also, in the Examples section you can see examples related to ESP8266.
In this article i will be guiding you to setup ESP8266 core in Arduino IDE for programming it through the IDE.
Lets get started,
- First of all Open your Arduino IDE.
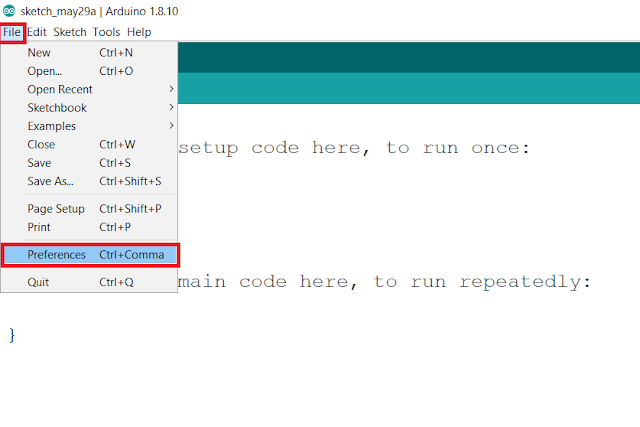
- Go to Preferences : For that Click on File and then down click on Preferences or you can simply hit CTRL + , as a shortcut to navigate to Preferences in Arduino IDE.
 |
| Navigating to Preferences in Arduino IDE |
- In Preferences : Settings Tab , you're gonna find Additional Boards Manager Url field
- Now, paste this url https://arduino.esp8266.com/stable/package_esp8266com_index.json in that field as shown in image below and click ok.
 |
| Additional Boards Manager Url section in Arduino IDE |
- After that, navigate to Tools > Board and Click on Boards Manager
 |
| Navigating to Boards Manager in Arduino IDE |
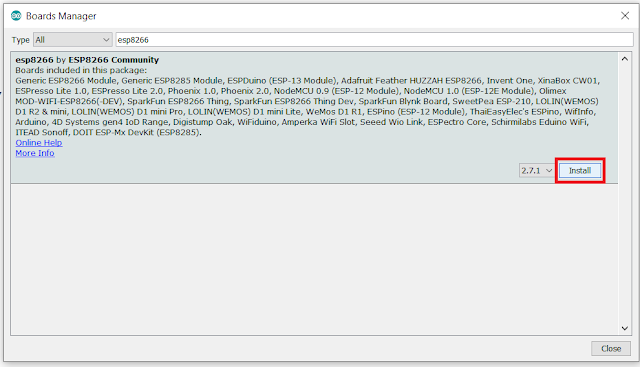
- In Boards Manager Window, in the search field type esp8266 and hit Enter. You're gonna find esp8266 by ESP8266 Community .
- Now, Click Install and you're done with the Setup. It will start downloading files and you can program ESP8266 once it gets completed.
 | |
| Installing Esp8266 in Boards Manager |

0 Comments